Stamp collecting is a fulfilling hobby with very few rules, but it’s actually much more than that. To many stamp collectors, it’s a way to explore the world, its many different countries, their diverse history, beautiful artwork and colourful cultures.
You don't have to buy expensive equipment to enjoy this hobby. Some simple stamp collecting accessories will serve you well.
Before getting started, choose a topic or area of interest that you’d like to collect. If you’re unsure what to choose, take a look at our in-depth Beginner’s Guide to Stamp Collecting to find out more.
Once you’ve done that, it’s time to invest in some basic stamp collecting equipment to get you started. Hopefully, the following information will offer some useful guidance.
Basic stamp collecting equipment you may want to buy
As is the case with any collecting hobby, the equipment you’ll need will depend largely on how much you intend to specialise in your chosen subject.
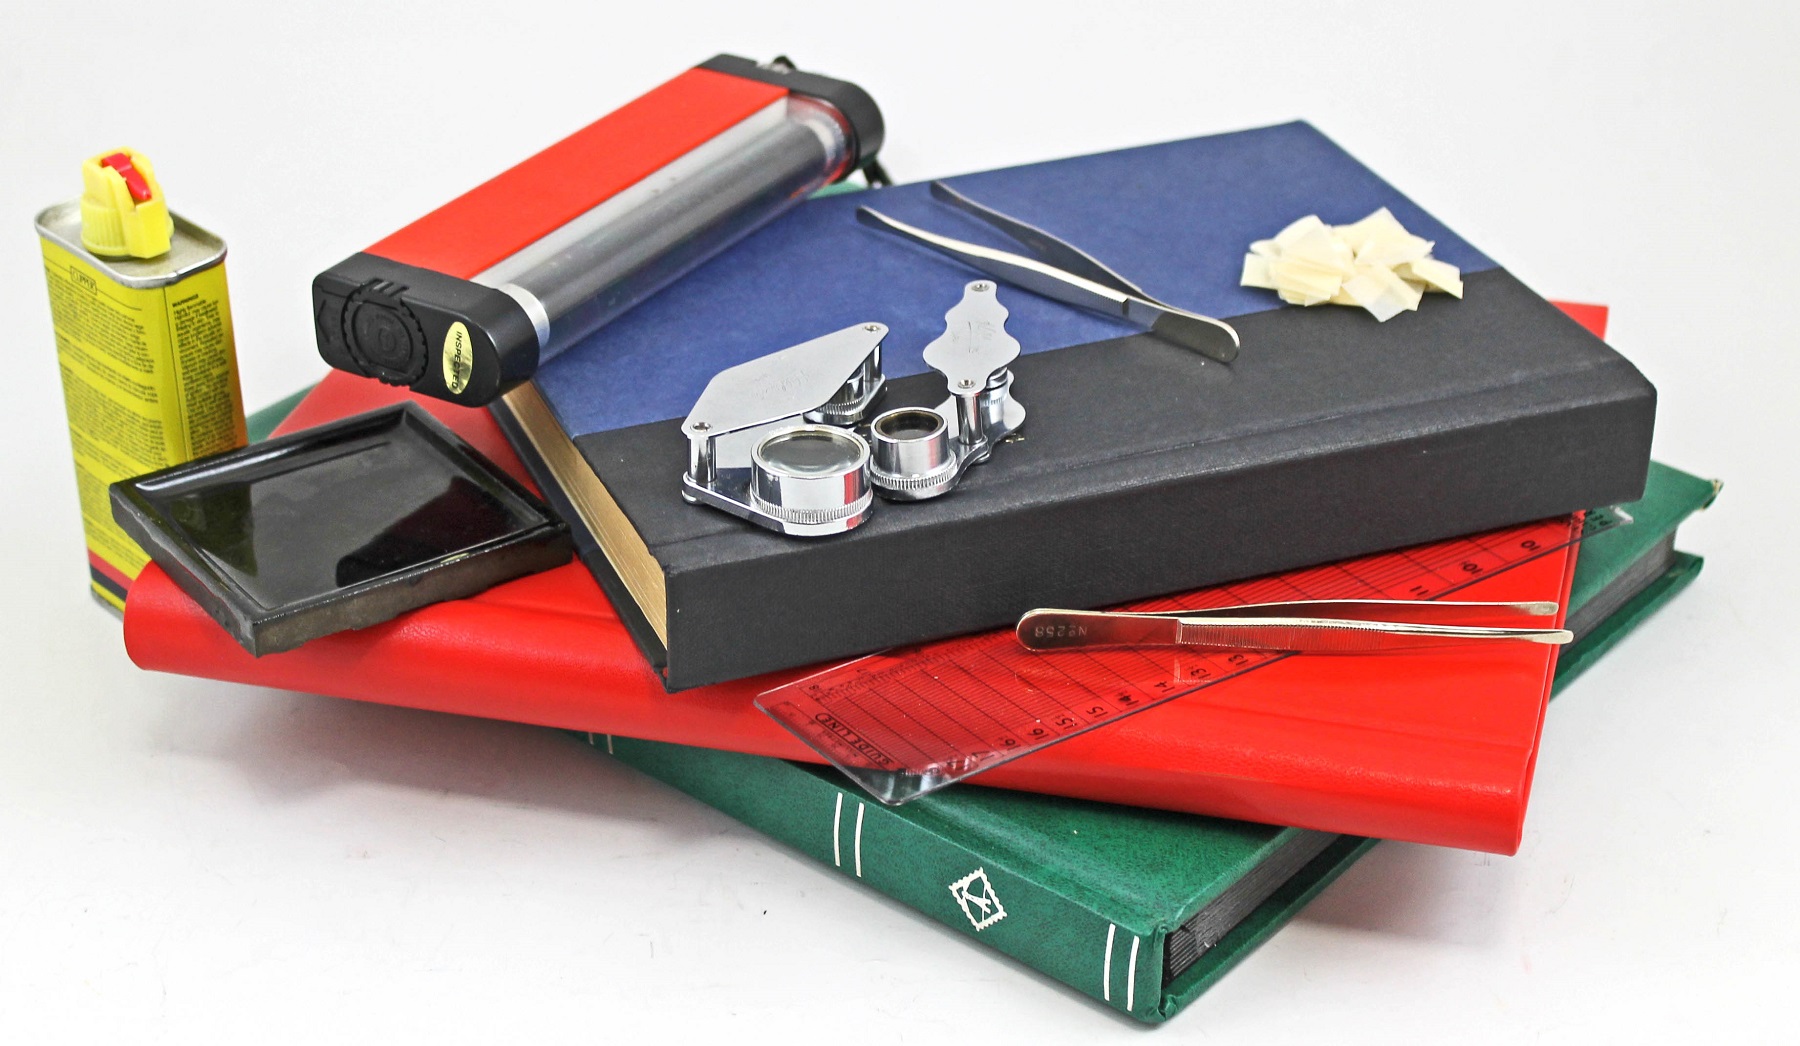
Obviously, you’ll need some stamps to get started, but it makes sense to spend more on stamps and a lot less on equipment than vice versa. The basic equipment we recommend includes:
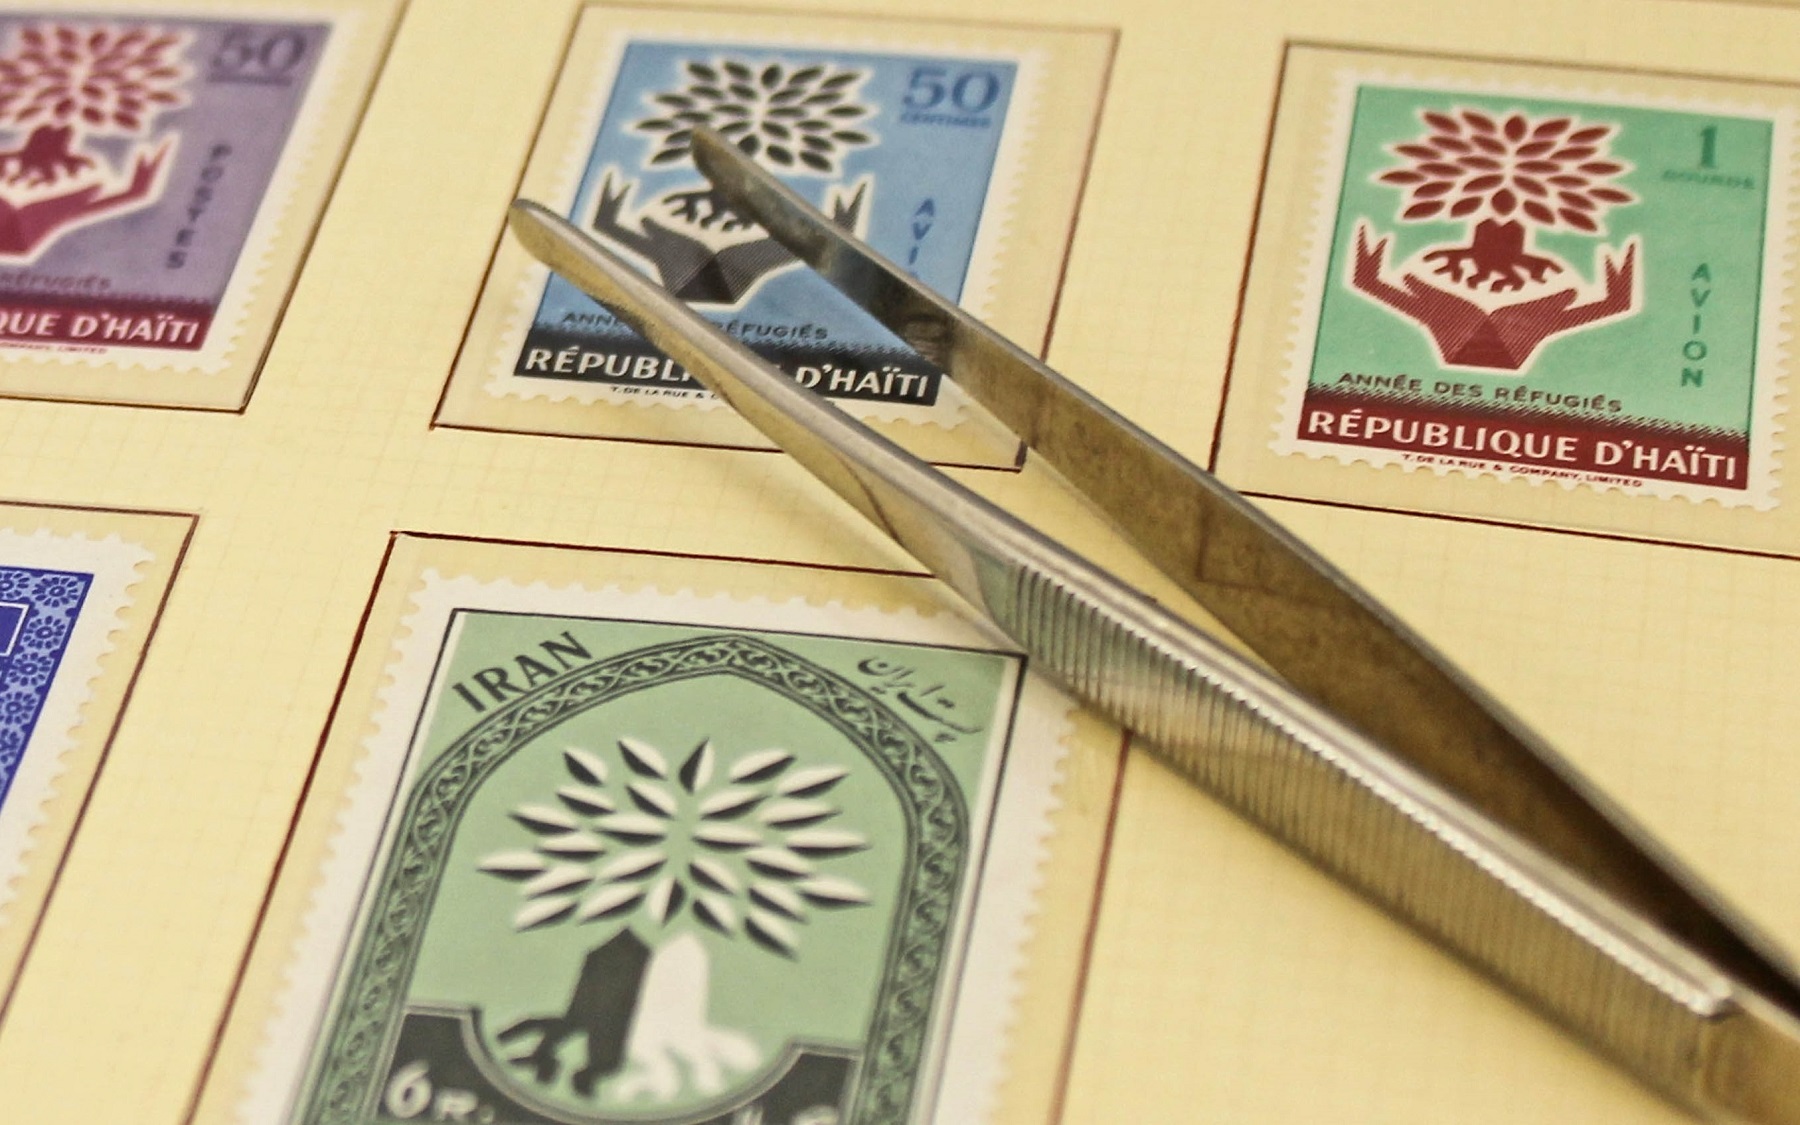
A pair of stamp tongs or tweezers: Tongs are essential for every stamp collector because handling stamps with your fingers can cause damage and deterioration due to the natural oils in our skin. Start with 'spade-end' tongs rather than 'pointed' ones (costing no more than £10) and once you’re used to handling stamps with them, you can then find a style which suits you best.
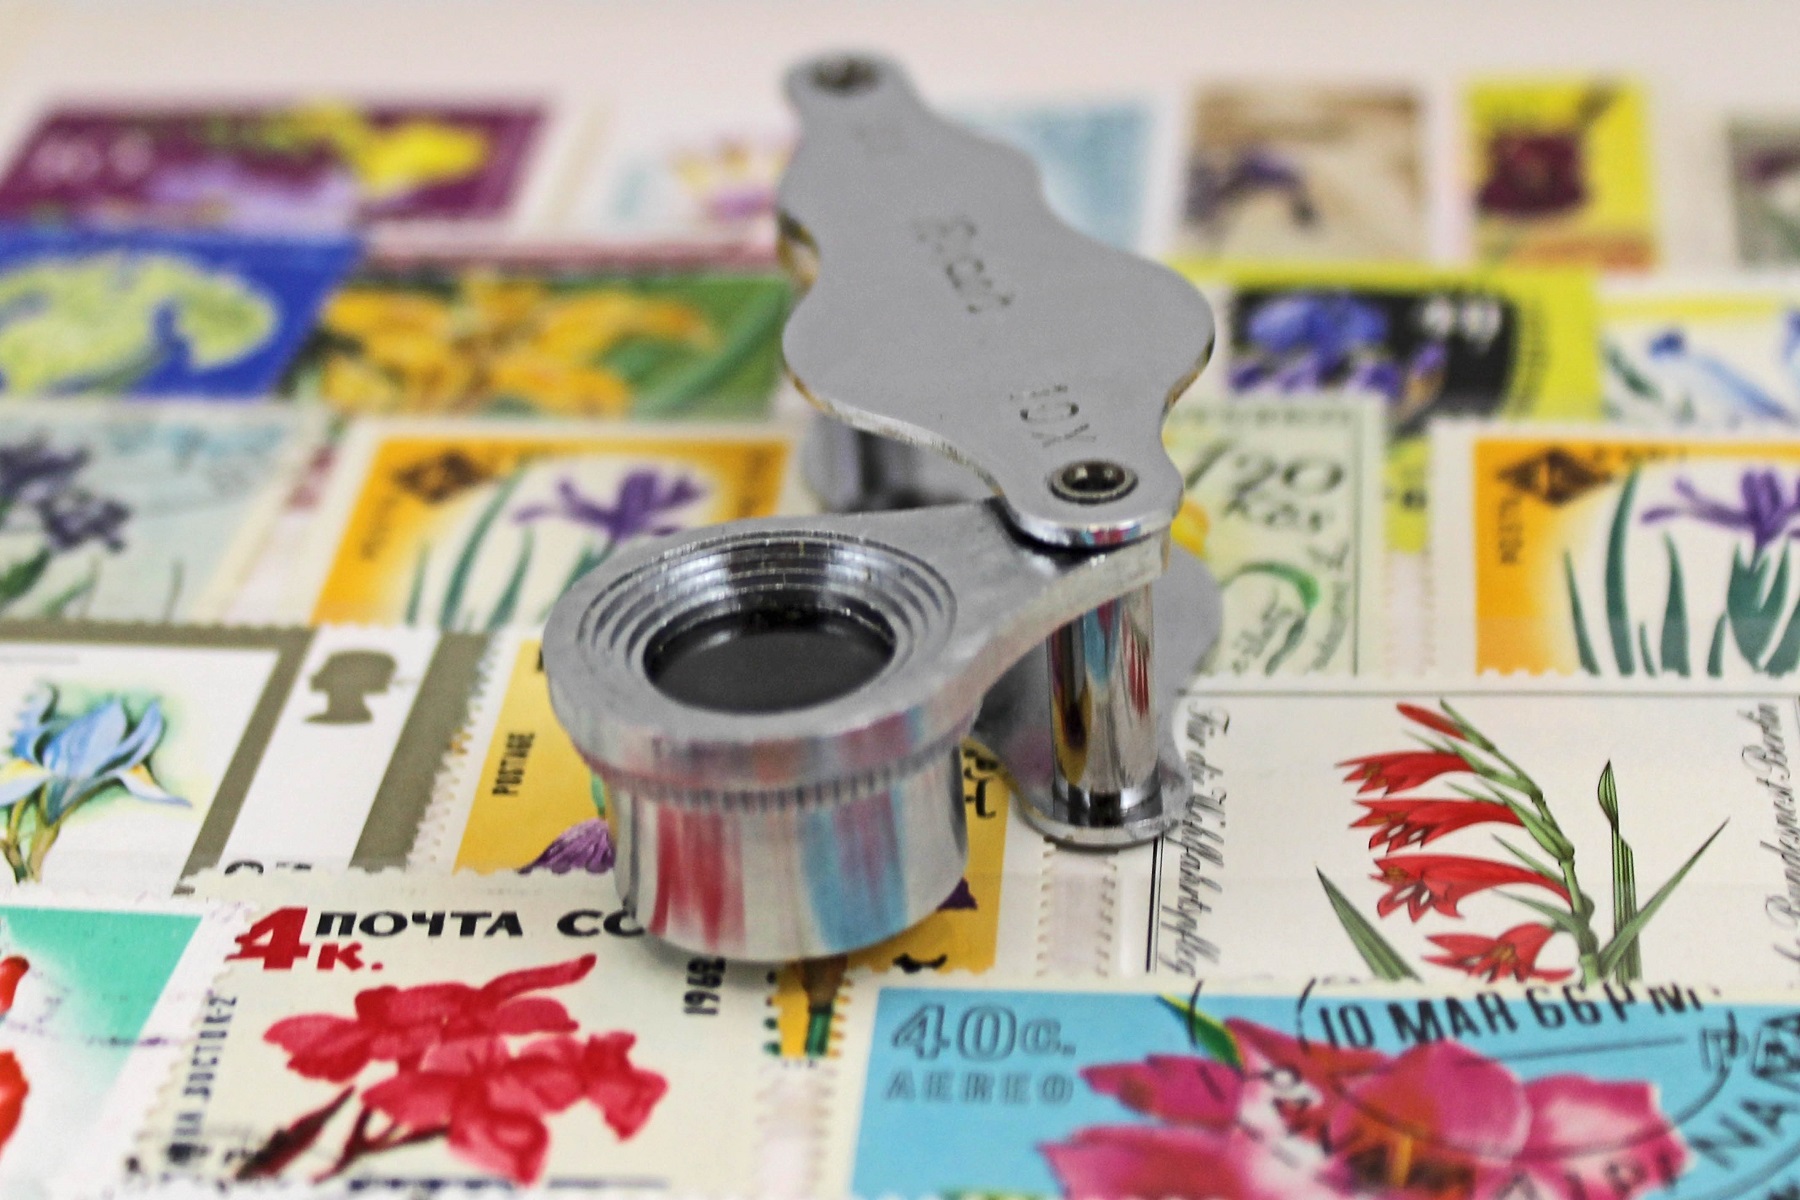
Magnifying glass: Most collectors like to look closely at their stamps, but don’t be tempted to go for anything more than x10 magnification (available for around £20) or you won’t be able to see your stamp’s design in context.
Perforation guide: A perforation gauge is useful to help you measure the number of perforations in a defined space, which may be the only difference between two stamps which are otherwise identical. The Gibbons Instanta can measure perforations to within a decimal point and is the most popular gauge used by collectors and dealers.
Watermark detector fluid: There’s no need to buy an expensive electronic device, good old-fashioned 'watermark fluid' and a watermark tray (which usually cost less than £10) will quickly help your watermark to be become visible.
Stamp albums: Opting for a loose-leaf book or ring binder will be sufficient to store your stamps until you’ve built up a collection that warrants an investment in more expensive albums. These are affordable (usually less than £5) and allow you to rearrange your collection easily, if required.
Colour guide: A useful tool to have if you want to tell the difference between stamps which are similar in appearance, but slightly different in shade - which can have a big influence on its overall worth.
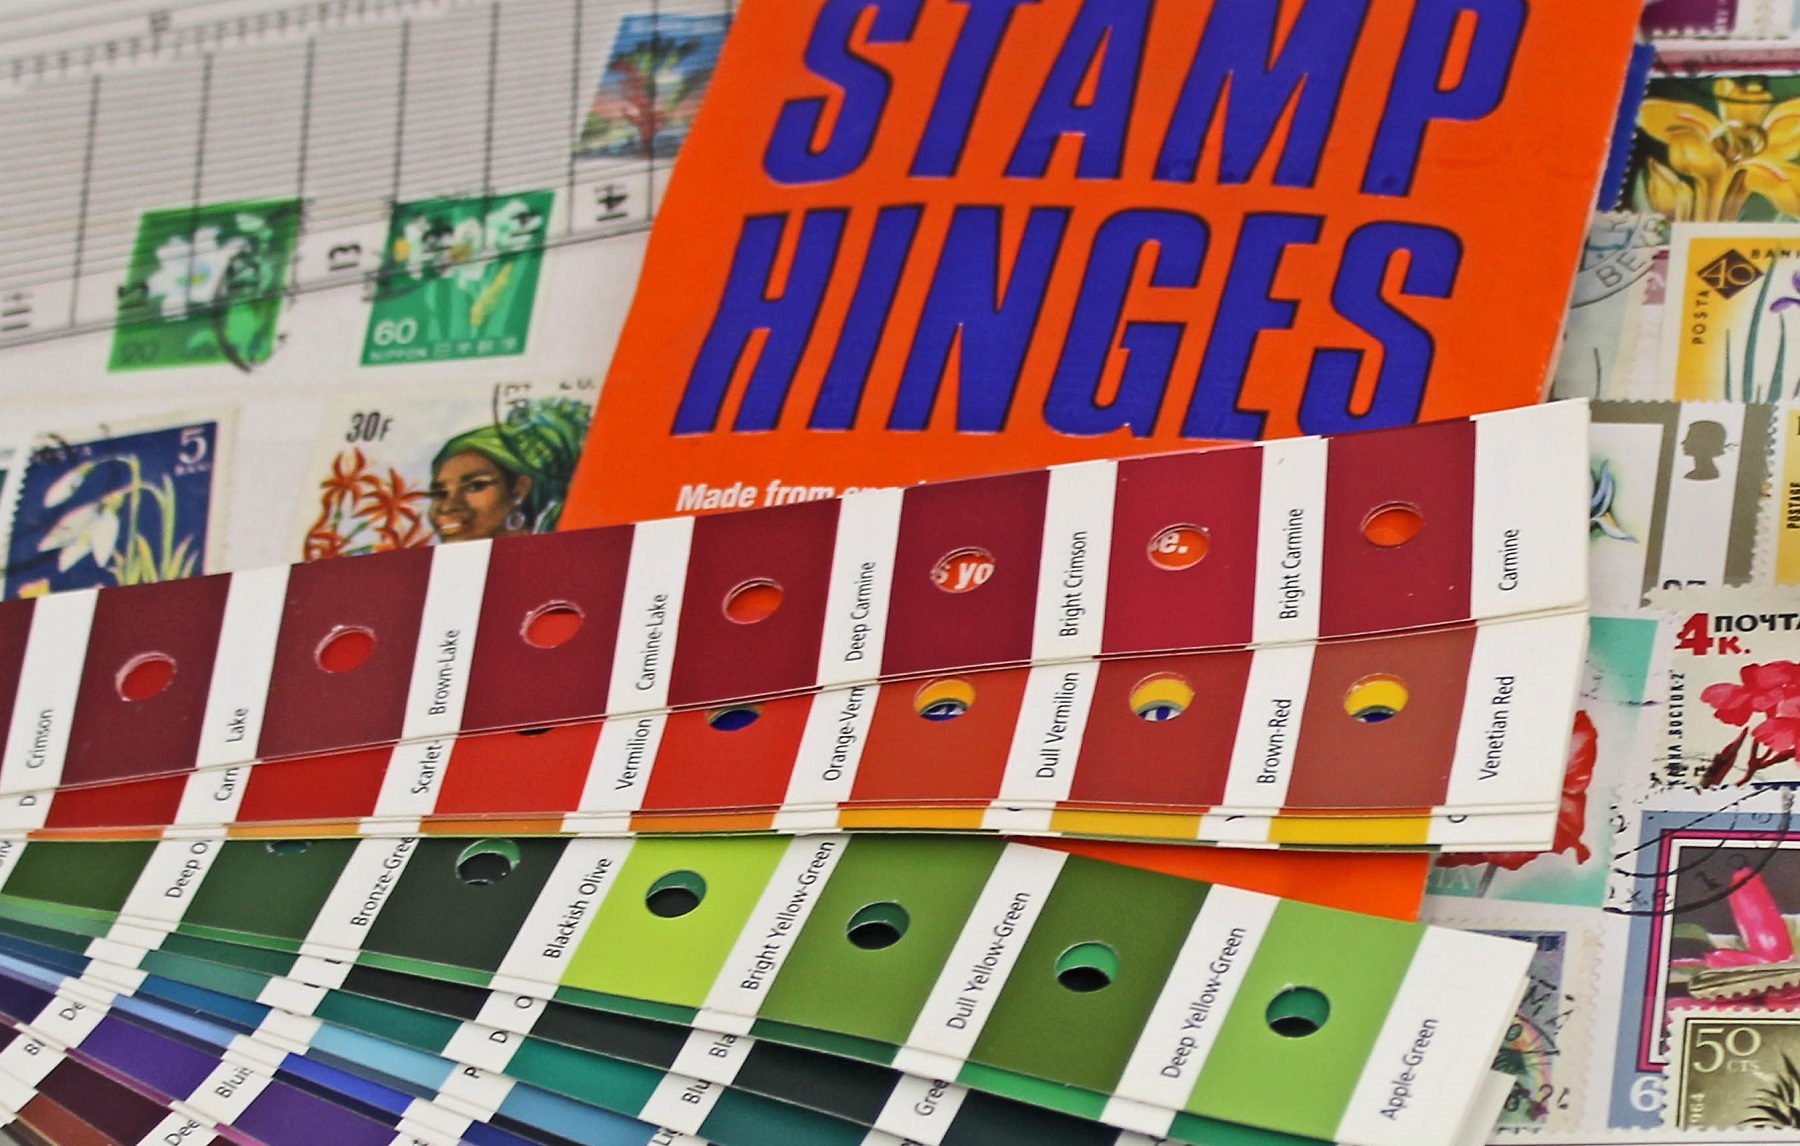
Hinges: The small gummed strip that’s used to fix a stamp to the page of an album is called a hinge. You’ll need some of these to arrange your stamps neatly.
An atlas or map: If you decide to collect stamps which are from a specific country, you’ll need one of these if you want to know where it is in the world - or you could use the internet if that’s easier.
A stamp identification book: Specialist reference books and stamp catalogues will help you to identify each stamp and tell you more about their background, such as how it was printed and the date of issue. Gibbons publish the most used catalogue in the UK, with Yvert and Tellier doing likewise in France and Michel in Germany. Collectors of stamps from the United States will need to use the Scott Specialized Catalogue. Well-stocked major libraries usually have a wide range of philatelic books that you can access or borrow.
Getting started – acquiring your stamps
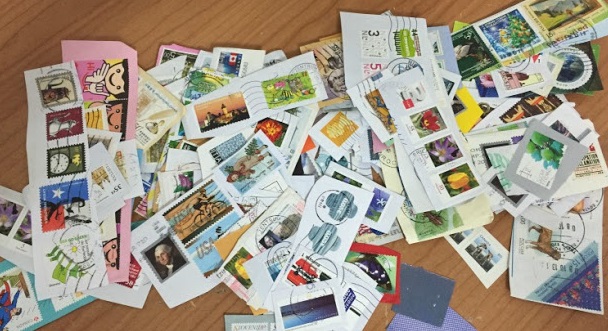
The traditional way to begin stamp collecting as a hobby is by acquiring used items on cards and envelopes.
Buying ‘kiloware’ stamps that are unsorted and sold according to their weight, is another good way to approach stamp collecting for beginners. Acquiring large packets of stamps or ‘stamp bags’ that have been sorted is also an option.
Sorting these into countries of origin can be time consuming, but it is also interesting and tremendously exciting.
Although auction houses tend to sell items of higher value it is also possible to buy relatively inexpensive mixed lots at Warwick & Warwick sales. You may also buy items at stamp fairs, jumble sales, online trading sites, charity shops and from dealers.
Regardless of how you choose to acquire your stamps, there are affordable avenues available to suit every buying and selling budget.
Sorting and soaking your stamps
Don’t attempt to remove a stamp from an envelope or its paper backing by pulling it as this will cause irreparable damage. Use a pair of sharp scissors to trim the paper (about 2cms around it) ready to be soaked.
It’s much easier to handle stamps when they’re attached to an envelope and it makes more sense to sort them before you soak them, which will make them delicate.
Because soaking stamps is quite time consuming, sorting at this stage will ensure you don’t waste time on stamps you don’t want or need.
How to soak stamps:
1. Pour some clean warm water into a bowl and float each stamp (with the design facing upwards) on the surface.
2. Float as many stamps as you can accommodate at any one time.
3. Leave for 10 to 15 minutes so the water can impregnate the gum which is making it stick to the paper.
4. Use your fingers to gently peel the stamp away from the paper. If it does not come away easily, leave to soak for another five minutes before trying again.
Proceed with caution!
Immersing some stamps in water will increase the chances of the ink running so proceed with caution.
Colours can also run from the envelopes or paper to which the stamps are affixed. Soak items like this separately so you do not run the risk of discolouring other items.
If you do see the ink running from a stamp or its backing paper during the soaking process, remove the item from the water immediately and replace the water to reduce the risk of staining other stamps.
When you begin stamp collecting, it’s important to stay with your items when soaking them so that you can react if necessary. As you gain in experience, you’ll learn exactly how long each stamp needs to be soaked.
Stamps damage easily when they are wet or damp. Do not use tweezers or stamp tongs at this stage or you could ruin them. If you peel a stamp away from its backing paper and there is still some gum on the back, try to remove it using a soft wet brush.
Soaking water can quickly become sticky or clouded with gum adhesive and it’s a good idea to change it for every batch of stamps.
How to dry stamps:
1. After their final soaking, use your fingers to carefully lay them flat (with the design face up) on a clean and dry piece of kitchen paper. Make sure the stamps are not touching each other.
2. Use another piece of kitchen paper to cover the wet stamps and gently press on them to blot away any excess water. Don’t use old newspapers to dry wet stamps as the ink can transfer onto the front or back of the stamp and ruin it.
3. Once all your stamps are laid out, cover with a normal piece of paper and sandwich in between some heavy books to flatten them as they dry.
4. Leave for between half an hour to an hour, carefully remove them and leave to ‘air’ until completely dry, usually for 3 to 4 hours. They are now ready to mount in an album.
5. Never attempt to speed up the drying by placing stamps on a hot radiator or in sunlight because they’ll curl and become damaged.
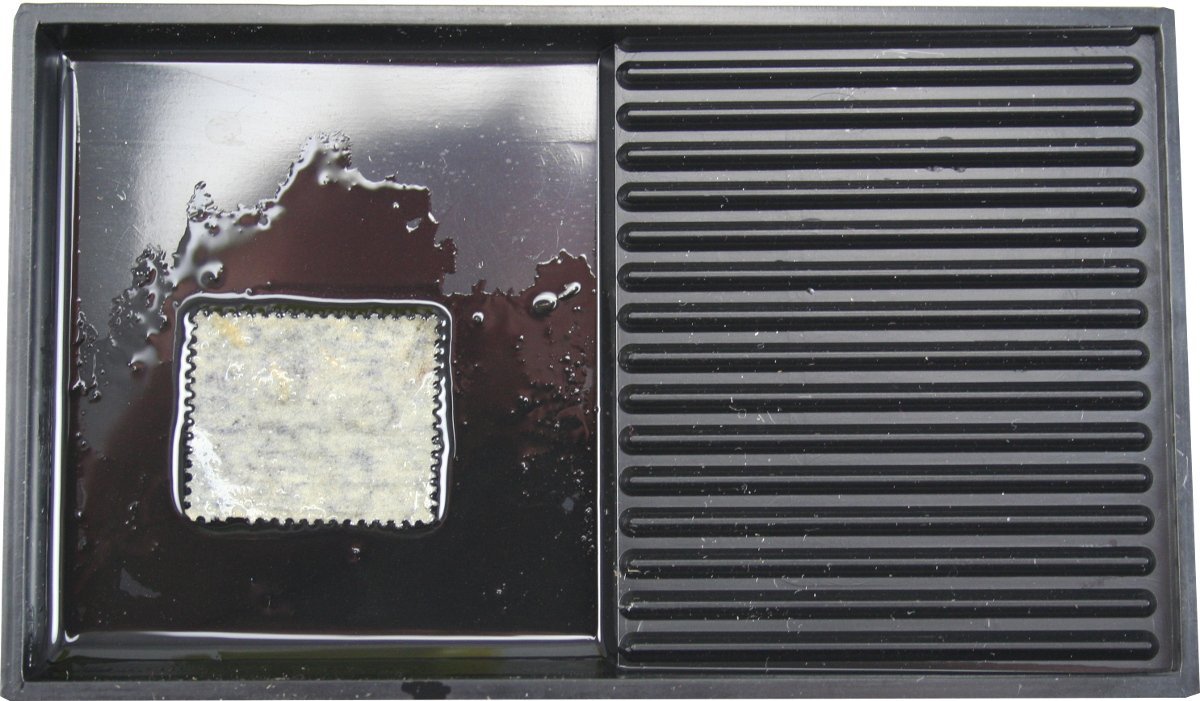
How to find a watermark
Finding a watermark can often be done simply by holding a stamp up to a strong light source. But if you need to examine a stamp in more detail, the best way to do it is by using watermark fluid and a watermark tray.
1. Use enough non-toxic watermark detector fluid to thinly cover the bottom of your tray.
2. Place the stamp design-down in the tray and the watermark should become visible almost instantly.
3. Although you can use watermark detector fluid on ‘mint’ and used stamps, it’s a good idea to experiment on cheap stamps first. A good fluid should not affect the gum and will usually dry quickly afterwards.
4. As a precaution, only use watermark fluid in a well-ventilated area and replace the lid immediately after use to prevent evaporation.
Mounting and displaying your stamps
Learning the art of mounting stamps is important and there are two main ways to do it that are accepted by collectors:
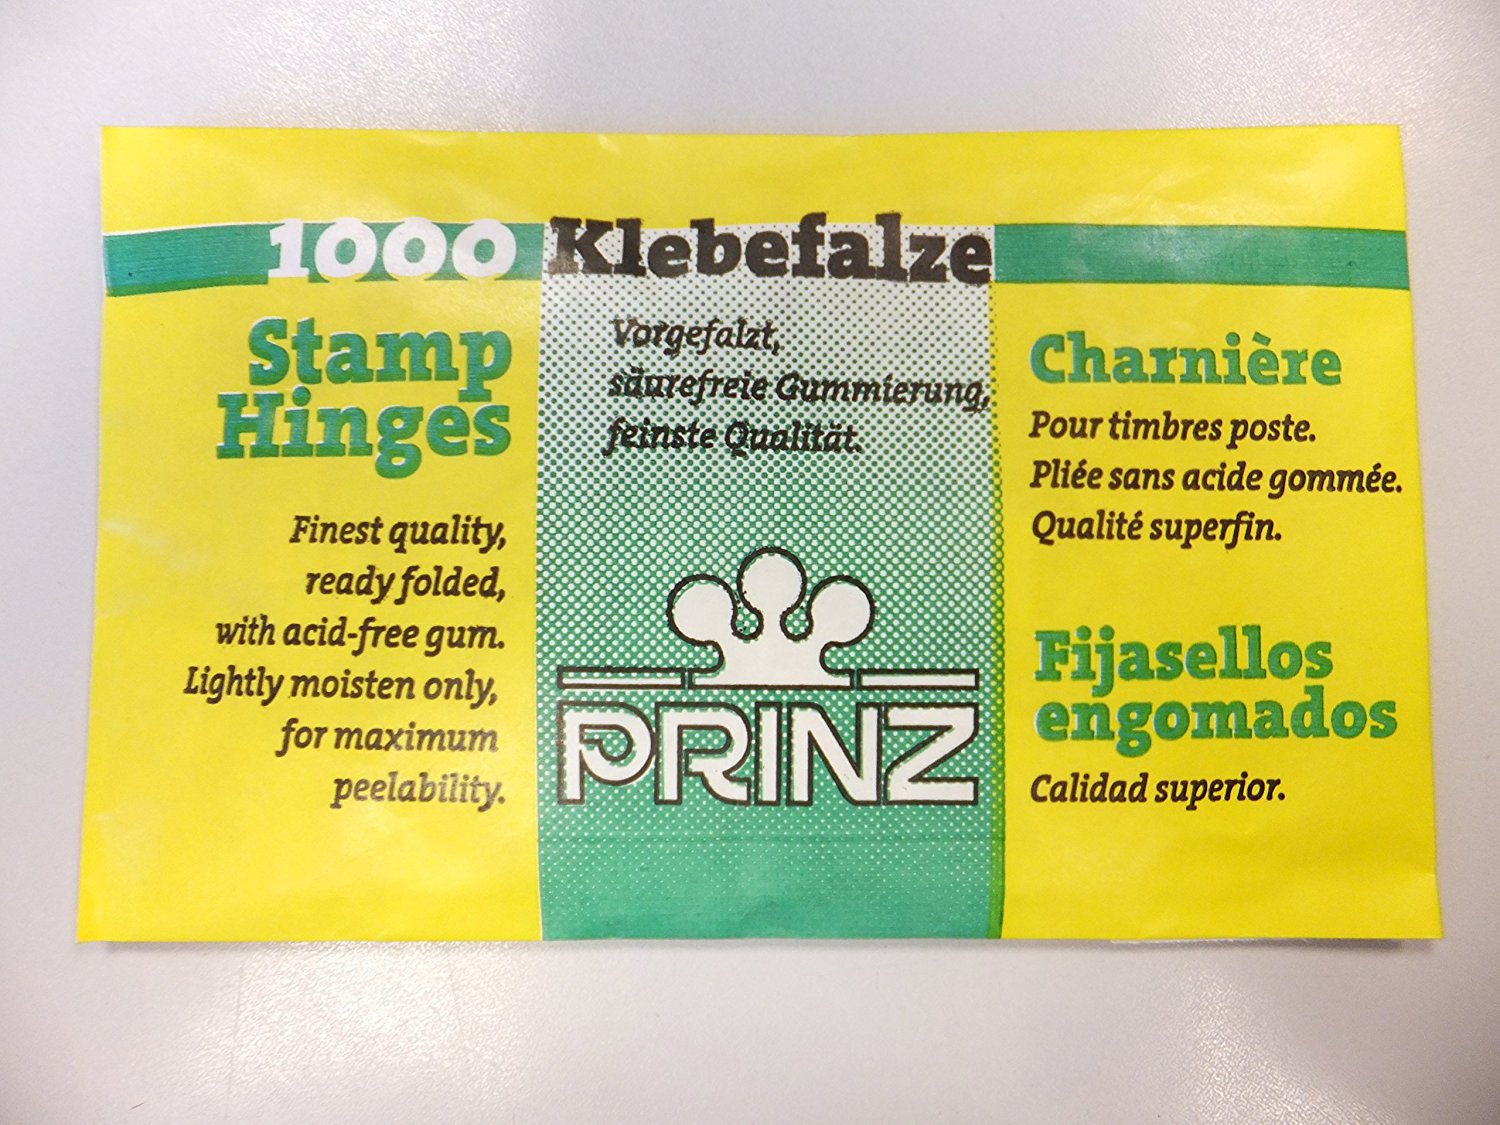
Stamp hinges
Ideal for used stamps which have been mounted before, stamp hinges are a small rectangular piece of folded glassine paper with gum on the outside. Made from acid-free paper, you can attach the shorter side of the hinge to the back of a stamp by licking and sticking it close to the stamp’s upper edge. Lick and stick the longer side of the hinge to place it on your album page, with the stamp design facing upwards.
Pros: A traditional option, they are inexpensive and cost about £2-3 for 1,000. When completely dry, a good stamp hinge can be peeled away to allow you to inspect its back or change its position in your album.
Cons: Unsuitable for stamps with ‘full original gum’ or no evidence of a previous hinge. They must not be removed unless they are 100 per cent dry or damage can be caused to the stamp and the album. Only lightly moisten with a slight touch of the tongue to avoid the risk of gum damage on a stamp.
Stamp mounts
Perfect for unused stamps with full original gum, these small plastic pockets actually hold the stamps ‘unmounted’ within them so they can be placed in an album without affecting their gum. Hinge-less mounts do come pre-gummed, but collectors often prefer to use stamp hinges to attach them to their album as it’s easier to reorder them later on.
Pros: Highly recommended for ‘mint’ unused stamps with undisturbed original gum because they’ll remain completely protected inside a plastic mount.
Cons: A much more expensive way to attach stamps to an album’s pages. Although they are available in various sizes, they still need cutting to accommodate a stamp’s exact width which is time-consuming.
Alternative products
As well as the two traditional stamp mounting methods mentioned above, there are several products available that will help mount your stamp in much less time.
Stock-books: Used by stamp dealers, stockbooks allow you to store your stamps beautifully without taking up a lot of your time. Each page has several horizontal rows made from thin strips of film to form long pockets in which to place your stamps side by side. Ideal for saving duplicate items, but much more expensive than stamp hinges or mounts.
Hinge-less albums: Similar to a traditional photo album with transparent plastic pockets that are exactly the right size for storing stamps. Simply use you stamp tongs to insert your stamps into the pockets provided.
Cover albums: Covers are an envelope or postal item which normally bear an example of a stamp in use. Some collectors like them because they can show unusual postmarks. Cover albums allow them to be mounted on blank pages, using either gummed photograph corners or specially designed plastic sleeves.
Learn more, start stamp collecting today!
There are now a wide variety of stamp collecting resources available online, including forums for collectors and dealers.
A hobby which is not bound by age limits or ability, it’s easy to make friends with likeminded people who share your love of collecting.
Once you have mastered the basics and selected a chosen area of interest, your hunt for stamps will know no bounds.
Read our How to appraise stamps guide and learn more about this thrilling hobby.
Should you ever come to acquire an item which you think might be rare or valuable, we’ll be more than happy to provide an accurate stamp valuation – simply get in touch with our experts to arrange a free consultation.